Below is a step-by-step of using the ODBC option on Revit 2011 64bit & MS Office 2010 64bit. This is so much better than having to deal with the "SQL Server" option because of using MS Office 32bit with Revit 64bit . The only draw back I found is that since my office is using "Newforma", which is not 64bit compatible, we are held down to only using 32bit. So my current workaround is to set up a "Remote PC" using MS Office 2010 64bit to do the Export/Import process. I havn't got around to testing if we can Import from a PC that has a 32bit version of MS Office, but soon enough when my busy schedule subsides back to normal.
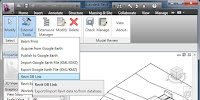
Step #1: Go to your Add-In Panel in Revit & click on External Tool & select the DB Link Tool
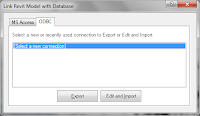
Step #2: Click on the ODBC Tab & select the "Select a new connection" & click Export
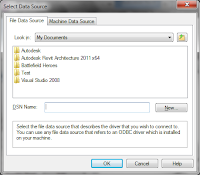
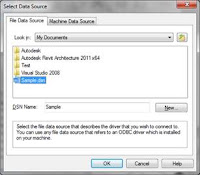
Step #3: In this Dial. Box select "New" (Creating the Data Source Name, its use could be like Per Project)
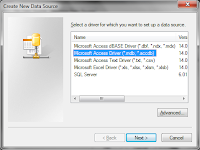
Step #4: Then select what I have highlighted "MS Access Driver" & click "Next"
Step #5: Click on "Browse"
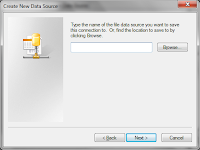
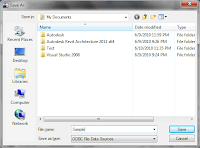
Step #6: Then select its Location, give it a Name & Click "Save"
Step #7: Click on "Next" Then click on "Finish"
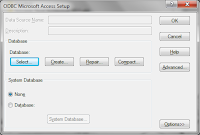
Step #8: Click on "Create" in the Database Column
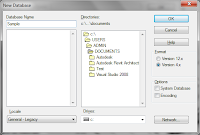
Step #10: Creating the DB & giving it a Name; (the DSN could be to the Project as the DB is to a file; each file will have its own DB if you did understand that already) & click "OK"
Step #11: Click "OK", click "OK" again, click "OK" one more time & select the DSN that was started in Step #3 & finished on Step #7 & Click "OK"
Step #12: Click "OK" one last time & let the Exporting process run its course.
So when needing to Import the DB back in after Editing it from Access or a linked Excel file; from Step #2 you would select a recently used connection (representing that files DB) and select the "Edit & Import" button then an Editable Dial. Box showing the Database pops up then select "OK" & the Process will run after that & this would be the perfect place to verify changes or if by chance Access is not installed then can be Edited from there.